
Honeywell Installation Manual: A Comprehensive Guide
This comprehensive guide details Honeywell thermostat installation, covering various models like TH6320R, HM750A1000, and PRO 2000 series.
It provides essential instructions, wiring diagrams, and troubleshooting steps for optimal HVAC system performance and user convenience.
Honeywell thermostats represent a cornerstone of modern home climate control, offering a diverse range of solutions from basic manual models to sophisticated programmable and smart thermostats. These devices are designed to efficiently manage heating and cooling systems, optimizing comfort and energy savings. Understanding the core functionalities and features of Honeywell thermostats is crucial for successful installation and operation.
From the PRO 2000 series (TH2110DV/TH2210DV) to commercial-grade options like the T7351, Honeywell caters to a wide spectrum of needs; The availability of detailed manuals, including PDF downloads for models like the TH6320R and HM750A1000, underscores Honeywell’s commitment to user support. These resources provide step-by-step guidance, wiring diagrams, and troubleshooting assistance, ensuring a smooth installation process. Proper installation is key to unlocking the full potential of your Honeywell thermostat, maximizing efficiency and ensuring reliable performance for years to come.
Understanding Different Honeywell Thermostat Series
Honeywell offers a broad portfolio of thermostat series, each tailored to specific system types and user preferences. The PRO 2000 series, including TH2110DV for 1 Heat/1 Cool and TH2210DV for heat pump systems, provides programmable control. Lyric thermostats offer smart features and remote access. For commercial applications, the T7351 delivers robust, programmable functionality.
Fixed Function thermostats, like the BACnet model, are engineered for precise control in specialized environments. Digital Fan Coil thermostats, such as the TB6575/TB8575, manage fan-powered heating and cooling. Understanding these distinctions is vital for selecting the correct model and utilizing the appropriate installation instructions. Each series has unique wiring requirements and setup procedures, detailed in dedicated manuals. Accessing the correct manual – whether a PDF download or a physical guide – ensures a successful and optimized installation, maximizing system performance and user satisfaction.
Safety Precautions Before Installation
Prior to commencing any Honeywell thermostat installation, absolute safety is paramount. Always disconnect power to the HVAC system at the breaker box to prevent electrical shock. Verify the power is off with a non-contact voltage tester. Exercise caution when handling wiring, ensuring no bare wires are exposed. If unfamiliar with electrical work, consult a qualified HVAC technician.
Proper labeling of existing wires is crucial before disconnecting them from the old thermostat. Take photographs for reference. Avoid working in damp or wet conditions. Wear appropriate safety glasses and gloves. Read and understand all installation instructions thoroughly before beginning. Failure to adhere to these precautions could result in personal injury, property damage, or improper system operation. Respect all local electrical codes and regulations during the installation process.
Installation Process: General Steps
Begin by turning off power at the breaker. Remove the old thermostat, label existing wires, mount the new subbase, connect the wires, and securely attach the thermostat.
Tools Required for Installation
Successful Honeywell thermostat installation necessitates a specific toolkit to ensure a safe and efficient process. Essential tools include a Phillips head screwdriver for securing the thermostat and subbase, and a flathead screwdriver for various wiring connections. A wire stripper is crucial for cleanly exposing wire ends without damaging the conductors, promoting reliable connections.
A voltage tester is paramount for verifying power is off before commencing work, preventing electrical shock. Pliers are useful for bending and manipulating wires, while a level ensures the thermostat is mounted straight for aesthetic appeal and accurate readings. A small drill with appropriate bits may be needed for creating mounting holes if existing ones are unsuitable.
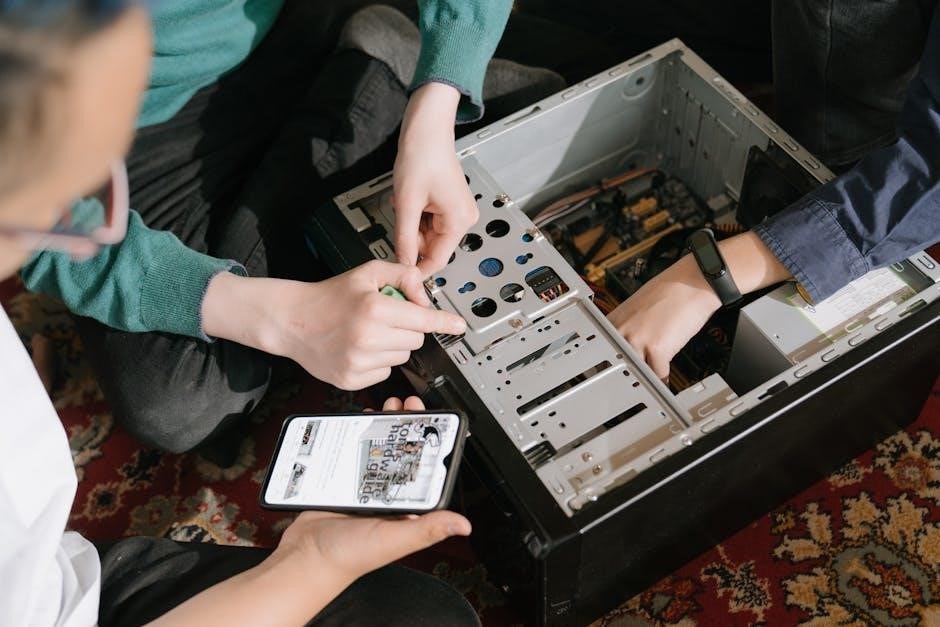
Additionally, a pencil for marking wire locations, and electrical tape for insulating connections, are highly recommended. For advanced installations, a multimeter can aid in diagnosing wiring issues. Finally, a digital camera or smartphone is helpful for documenting the existing wiring configuration before disconnection, simplifying reconnection to the new thermostat.
Preparing the Existing Wiring
Before installing your new Honeywell thermostat, meticulous preparation of the existing wiring is critical. Begin by completely powering down the HVAC system at the breaker box to prevent electrical hazards. Carefully remove the old thermostat from the wall plate, noting the terminal designations of each wire. Crucially, photograph the wiring configuration before disconnecting anything – this serves as an invaluable reference during reinstallation.
Label each wire with its corresponding terminal letter using small labels or masking tape. Inspect the wires for damage, such as fraying or corrosion. If damaged, carefully trim and strip the wire back to expose fresh conductor. Ensure each wire end is straight and clean for secure connection to the new thermostat’s terminals.
If you encounter a jumper wire, document its position and purpose. Properly preparing the wiring ensures a smooth installation and avoids potential compatibility issues with your new Honeywell thermostat.
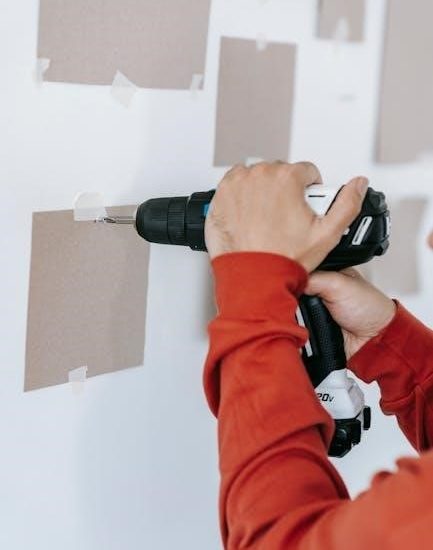
Mounting the Thermostat Subbase
Once the wiring is prepared, mounting the thermostat subbase is the next crucial step. Position the subbase on the wall, ensuring it’s level for accurate temperature readings. Utilize the provided mounting screws and wall anchors, if necessary, to securely attach the subbase to the wall. Avoid overtightening the screws, as this could damage the wall or the subbase itself.
Carefully feed the wires through the designated opening in the subbase. Ensure no wires are pinched or strained during this process. Double-check that the subbase is firmly mounted and level before proceeding with the wiring connections. A secure subbase provides a stable foundation for the thermostat.
Confirm the subbase is flush against the wall, creating a clean and professional appearance. Proper mounting is essential for both functionality and aesthetics.
Wiring Diagrams & Configurations
Detailed wiring schematics are vital for correct installation. Configurations vary based on system type – single-stage, multi-stage, heat pump, or millivolt – requiring precise connections.
Wiring for Single-Stage Heating and Cooling Systems
For basic single-stage systems, the wiring is relatively straightforward. Typically, you’ll connect the Rh wire (heating power) and Rc wire (cooling power) to the corresponding terminals on the thermostat subbase. The W wire controls the heating, connecting to the W terminal, while the Y wire activates the cooling, connecting to the Y terminal.
The common wire (C) is crucial for providing consistent power to the thermostat, ensuring reliable operation. Connect the C wire to the C terminal. If a C wire isn’t present, a C-wire adapter may be necessary. Ensure the power is OFF at the breaker before making any connections.
Double-check all connections against the specific wiring diagram for your Honeywell thermostat model. Incorrect wiring can damage the thermostat or HVAC system. Properly tightened connections are also essential for a stable and functional setup. Refer to the installation instructions for detailed guidance and safety precautions.
Wiring for Multi-Stage Heating and Cooling Systems
Multi-stage systems require more complex wiring due to the multiple heating and cooling levels. You’ll have multiple Rh and Rc wires, each corresponding to a different stage of operation. Similarly, there will be multiple W and Y wires for heating and cooling stages. Carefully identify each wire based on your HVAC system’s configuration.
The thermostat subbase will have designated terminals for each stage (W1, W2, Y1, Y2, etc.). Connect each wire to its corresponding terminal, ensuring a secure connection. A common wire (C) is essential for powering the thermostat and enabling multi-stage functionality.
Consult the specific wiring diagram provided with your Honeywell thermostat model and HVAC system. Incorrect wiring can lead to improper operation or damage. Always disconnect power at the breaker before working with wiring. Double-check all connections before restoring power.
Wiring for Heat Pump Systems
Heat pump wiring differs significantly from conventional systems, requiring careful attention to detail. Typically, heat pumps utilize a reversing valve to switch between heating and cooling modes. The ‘O’ or ‘B’ terminal controls this valve; ‘O’ is for cooling, and ‘B’ for heating – verify your system’s configuration.
A common wire (C) is crucial for powering the thermostat and operating the reversing valve. You’ll also have wires for the compressor (Y), auxiliary heat (W1/W2), and fan (G). Some systems may include a wire for emergency heat (E).
Refer to the specific wiring diagram for your Honeywell thermostat and heat pump model. Incorrect wiring can damage the compressor or prevent proper heating/cooling. Always de-energize the system at the breaker before making connections. Ensure all connections are secure and properly insulated.
Wiring for Millivolt Systems
Millivolt systems, commonly found in fireplaces, operate differently than standard HVAC systems. They generate their own power through a thermopile, eliminating the need for a common (C) wire. Wiring is significantly simpler, typically involving only two wires: one for the thermostat and one for the gas valve.
The thermostat wire connects to the gas valve’s ‘T’ terminal, while the gas valve connects to the thermostat’s ‘V’ terminal. Polarity is generally not critical in millivolt systems, but it’s best to maintain consistency. Ensure a secure connection to the gas valve to prevent intermittent operation.
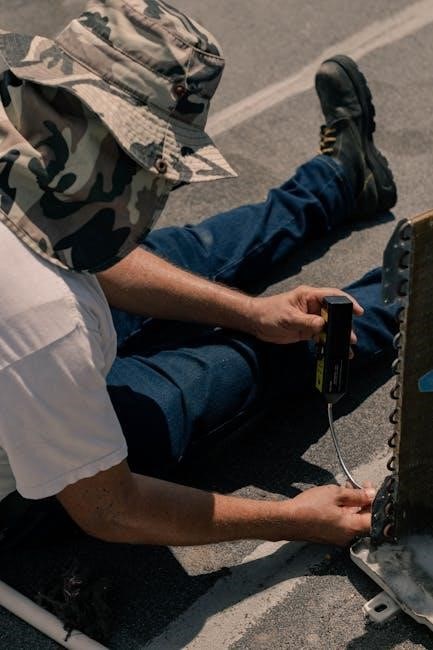
Testing the millivolt output is crucial after installation. Use a multimeter to verify sufficient voltage is being generated by the thermopile. Low voltage can cause the system to fail to ignite. Consult the fireplace manufacturer’s instructions for specific millivolt requirements.
Specific Model Installation Guides
Detailed instructions are available for models like TH6320R, HM750A1000, PRO 2000 (TH2110DV/TH2210DV), T7351, and TB6575/TB8575, ensuring correct setup and operation.
Honeywell TH6320R Installation
The Honeywell TH6320R is a popular programmable thermostat, and its installation requires careful attention to wiring and setup. Begin by powering off the HVAC system at the breaker to ensure safety. Remove the old thermostat, carefully labeling each wire before disconnecting it.
Use the provided mounting plate to secure the TH6320R subbase to the wall, ensuring it’s level. Connect the wires to the appropriate terminals on the subbase, referencing the specific wiring diagram for your system configuration – single-stage, multi-stage, or heat pump.
Once wired, attach the thermostat to the subbase. Power on the HVAC system and follow the on-screen setup wizard to configure the date, time, and system type. Program your desired temperature schedules for optimal comfort and energy savings. Verify proper operation of both heating and cooling modes.
Honeywell HM750A1000 Installation
Installing the Honeywell HM750A1000 demands precision, as it’s designed for advanced HVAC systems. Prioritize safety by switching off power to your system at the breaker box. Document existing wiring connections before disconnecting the old thermostat – photographs are helpful.
Mount the HM750A1000’s backplate securely to the wall, ensuring it’s level. Connect the wires to the designated terminals, strictly adhering to the wiring diagram specific to your heating and cooling setup. This model often supports more complex configurations, so double-check each connection.
Attach the thermostat unit to the backplate. Restore power and initiate the setup process. The HM750A1000 features a guided setup, prompting you to define system type, schedules, and preferences. Test both heating and cooling functions thoroughly to confirm correct operation.
Honeywell PRO 2000 Series (TH2110DV/TH2210DV) Installation
Installing the Honeywell PRO 2000 (TH2110DV/TH2210DV) requires careful attention to system compatibility. The TH2110DV suits 1 Heat/1 Cool systems, while the TH2210DV is for 2 Heat/1 Cool heat pump setups. Always verify your system type before proceeding. Begin by powering down the HVAC system at the breaker.
Remove the old thermostat and label each wire meticulously. Mount the PRO 2000’s subbase, ensuring it’s level. Connect the wires to the appropriate terminals, referencing the specific wiring diagram included with the thermostat. Pay close attention to the ‘C’ wire, often required for consistent power.
Attach the thermostat body to the subbase. Restore power and follow the on-screen setup wizard. Configure system settings, temperature preferences, and scheduling options. Test both heating and cooling modes to validate proper functionality.
Honeywell T7351 Commercial Programmable Thermostat Installation
The Honeywell T7351 is designed for commercial single-zone HVAC systems, supporting both conventional and heat pump configurations. Prior to installation, ensure compatibility with your existing equipment and wiring. Begin by disconnecting power to the HVAC system at the breaker panel for safety.
Carefully remove the existing thermostat, labeling each wire before disconnection; Mount the T7351 subbase securely to the wall, ensuring it’s level. Connect the wires to the designated terminals, strictly adhering to the provided wiring diagram (Form No. 62-0258-07).
Attach the thermostat body to the subbase. Restore power and initiate the setup process. Program the desired schedule, considering occupancy patterns and energy-saving goals. Thoroughly test heating and cooling functions to confirm correct operation and system responsiveness.
Honeywell BACnet Fixed Function Thermostat Installation
The Honeywell BACnet fixed function thermostat is engineered for building automation systems, offering precise temperature control and network integration. Installation requires familiarity with BACnet protocols and building control systems. Begin by consulting the Engineering Guide (Form No. 31-00098) for detailed specifications and wiring requirements.
Disconnect power before removing the existing thermostat, carefully labeling all wires. Mount the thermostat subbase securely, ensuring proper alignment. Connect the wiring according to the BACnet wiring diagram, paying close attention to network communication connections (typically A and B terminals).
Power up the system and configure the thermostat’s BACnet settings using a compatible building automation tool. Verify network communication and device discovery. Test heating and cooling functions, confirming proper operation and integration with the overall building control strategy.
Honeywell TB6575/TB8575 Digital Fan Coil Thermostats Installation
Installing the Honeywell TB6575/TB8575 digital fan coil thermostat involves careful wiring and configuration for optimal performance. Begin by disconnecting power to the fan coil unit. Remove the existing thermostat and identify all existing wiring connections, labeling them clearly for reference.
Mount the new thermostat subbase securely to the wall. Refer to the wiring diagram (Installation Instructions 62-031113) and connect the wires to the appropriate terminals. Pay close attention to the wiring for the fan speed control, heating/cooling valves, and any auxiliary functions.
Utilize the Installer Setup (IS) codes (Table 4) to customize the thermostat’s settings for the specific fan coil system. Power up the unit and verify proper operation of all functions, including fan speeds, heating, and cooling. Confirm accurate temperature readings and control.
Thermostat Setup & Programming
After installation, configure your Honeywell thermostat using the setup wizard. Set the correct date, time, and program personalized temperature schedules for optimal comfort and efficiency.
Initial Thermostat Setup Wizard
Upon powering on your new Honeywell thermostat, an intuitive setup wizard will guide you through the initial configuration process. This wizard is designed to simplify personalization and ensure optimal performance from the start. The first step typically involves selecting your preferred language and date/time format.
Next, the wizard will prompt you to identify your heating and cooling system type – options include single-stage, multi-stage, or heat pump systems. Accurate system identification is crucial for correct operation. Following this, you’ll be asked about your fuel source (gas, oil, electric).
The wizard may also inquire about specific features of your HVAC equipment, such as the presence of a humidifier or fan control. Completing these steps allows the thermostat to tailor its settings to your unique home environment. Carefully follow the on-screen prompts, and don’t hesitate to consult the full installation manual for detailed explanations of each setting.
Setting Date and Time
Accurate date and time settings are fundamental for proper thermostat operation, especially when utilizing programmable schedules. Access the date and time settings through the thermostat’s menu, typically found under a “Settings” or “Configuration” option. Navigate using the thermostat’s touchscreen or buttons, as applicable to your specific model.
You’ll generally be presented with separate fields for setting the month, day, and year. Similarly, you’ll adjust the hour and minute, and select AM or PM. Pay close attention to ensure correct input, as incorrect settings will affect scheduling and potentially other features.
Some Honeywell thermostats may offer automatic date and time synchronization via the internet, if connected to Wi-Fi. This eliminates the need for manual adjustments. Verify the accuracy of the settings after completion, and save any changes made. Proper timekeeping ensures your heating and cooling system operates efficiently and according to your desired schedule.
Programming Temperature Schedules
Honeywell thermostats excel in energy savings through programmable schedules. Access the scheduling function via the thermostat’s menu, often labeled “Schedule” or “Programming.” Most models allow for customized settings for weekdays, weekends, or even individual days. You’ll define different temperature “periods” throughout the day – such as Wake, Leave, Return, and Sleep.
For each period, set your desired temperature. Consider lowering the temperature while away or asleep to conserve energy. Experiment with different settings to find a balance between comfort and efficiency. Some thermostats offer pre-programmed schedules, which can be modified to suit your lifestyle.
Utilize the thermostat’s interface to easily adjust period times and temperatures. Review your schedule regularly to ensure it aligns with your needs. Advanced models may support multiple schedules or learning capabilities, adapting to your habits over time.
Understanding Fan Control Settings
Honeywell thermostats offer various fan control options beyond simply “Auto” and “On.” The “Auto” setting runs the fan only during heating or cooling cycles, optimizing energy use. Selecting “On” keeps the fan running continuously, providing consistent air circulation and potentially improving air quality.
Some models feature a “Circulate” setting, which periodically runs the fan for a short duration, even when heating or cooling isn’t active. This helps maintain even temperatures throughout your home. Explore the thermostat’s menu to find these settings, typically located within the “Fan” or “System” options.
Consider your home’s layout and your personal preferences when choosing a fan control mode. Continuous fan operation can increase energy consumption, but may be beneficial for homes with uneven heating or cooling. Experiment to determine the optimal setting for your comfort and efficiency.
Troubleshooting Common Issues
This section addresses frequent problems like power failures, inaccurate readings, communication errors, and unresponsive HVAC systems. Detailed solutions and diagnostic steps are provided for efficient resolution.
Thermostat Not Powering On
If your Honeywell thermostat fails to power on, several factors could be at play. First, verify the power supply; ensure the HVAC system’s breaker hasn’t tripped and that the thermostat wiring is securely connected. Check the C-wire (common wire), as many modern thermostats require it for continuous power – a missing or improperly connected C-wire is a common culprit;
Inspect the batteries if your model uses them, replacing them with fresh ones even if they appear to have some charge. Confirm the thermostat subbase is correctly mounted and making proper contact. Review the wiring diagram specific to your model to ensure all wires are connected to the correct terminals.
A blown fuse within the HVAC system could also be the issue. If problems persist, consult a qualified HVAC technician to diagnose potential electrical issues or thermostat malfunctions. Always disconnect power before inspecting wiring.
Incorrect Temperature Readings
If your Honeywell thermostat displays inaccurate temperatures, begin by ensuring it isn’t directly exposed to sunlight, drafts, or heat-generating appliances. These external factors can significantly skew readings. Check for proper airflow around the thermostat; obstructions can lead to inaccurate sensing.
Calibrate the thermostat if your model offers this feature – consult the user manual for specific instructions. Verify the thermostat’s location isn’t near exterior walls or poorly insulated areas. Confirm the wiring is secure, as loose connections can sometimes cause erratic behavior.
Consider a thermostat relocation if the current position consistently provides incorrect readings. If the issue persists, the thermostat’s internal temperature sensor may be faulty, requiring professional repair or replacement. Regularly check for dust accumulation inside the unit.
Communication Errors
Honeywell thermostat communication errors often manifest as a loss of connection to the HVAC system or the Honeywell Home app. First, verify the Wi-Fi connection is stable if your thermostat is a smart model. Ensure the thermostat is within range of your router and that there are no significant wireless interferences.
Check the C-wire connection; a stable power supply is crucial for consistent communication. Restart both the thermostat and your home’s Wi-Fi router. If using a remote sensor, confirm its batteries are fresh and it’s properly paired with the thermostat.
Review the Honeywell Home app for any firmware updates for the thermostat. If the problem continues, consult the troubleshooting section of your thermostat’s manual or contact Honeywell support for assistance. A factory reset might resolve persistent communication issues.
HVAC System Not Responding
If your HVAC system isn’t responding to the Honeywell thermostat, begin by verifying the system’s power supply at the breaker box. Ensure the thermostat is set to the correct operating mode – Heat, Cool, or Auto. Double-check the wiring connections at both the thermostat and the HVAC unit, referencing the appropriate wiring diagram for your system type.
Confirm the thermostat’s batteries are fresh, even if it’s hardwired, as they often power the control board. Inspect the HVAC system’s air filter; a clogged filter can cause the system to shut down. Test the system directly at the HVAC unit to bypass the thermostat and confirm functionality.
If the system still doesn’t respond, consult a qualified HVAC technician. A faulty relay or other component within the HVAC system may be the cause. Refer to your thermostat’s manual for specific troubleshooting steps related to your model.